
In order to do well on the TOEFL, you don’t simply need to be good at English — you also need to know how to take clear and effective notes. This is why we’re giving you 17 expert TOEFL note-taking tips. With these tips, you’ll be able to answer TOEFL questions faster and more accurately than ever before.
In this article, we’ll explain what sections you’re allowed to take notes on and then take a close look at the various ways TOEFL notes can help you get the Listening, Speaking, and Writing scores you deserve.
Can You Take Notes on the TOEFL?
First things first, are you allowed to take notes on the TOEFL? The answer is yes — you may take notes on every section of the TOEFL. According to ETS (the creators of the TOEFL),
“You can take notes throughout the entire test, using the paper provided by the test administrator. At the end of testing, all paper is collected and destroyed at the test center to ensure test security. Do not tear or remove part of any piece of scratch paper.”
Your test center will give you scratch (blank) paper to use during the test. If you run out of paper at any time, you may ask a staff member to give you more. At the end of the test, your notes will be collected and destroyed for security purposes. In other words, you may not remove your TOEFL notes from the test center, even once you’ve completed the test.
Although you are welcome to take notes on all TOEFL sections, you likely won’t need to take any notes during the Reading section. This is because each passage given to you stays on-screen as you answer its questions, allowing you to reread the passage as many times as you want.
Still, it’s a smart idea to take notes on the Listening, Speaking, and Writing sections. These three sections require unique approaches to TOEFL note taking, which we’ll look at in just a moment. But first, what are some general TOEFL note-taking tips that you can apply to any TOEFL section?
By the way: we have built the world's best online TOEFL course. Get online practice (TPO-sytle!) and individual grading and feedback on Speaking and Writing.
To be fair, it's possible to get a good TOEFL score studying alone. But PrepScholar is the world's most effective TOEFL course if you are worried about the TOEFL and are struggling to improve your score.
Learn how you can improve your TOEFL score by 15 points today.
How to Take Notes on the TOEFL: 6 General Tips
Before we teach you how to take notes on specific TOEFL sections, let’s look at some general TOEFL note-taking tips you can use throughout the exam.
#1: Make the Most Of Your Scratch Paper
On the TOEFL, it’s important to use the space on your scratch paper wisely. One reason is so you don’t have to constantly flip to a new page or turn a page over to continue your notes. You also don’t want to have to ask a staff member for additional scratch paper, as this can waste valuable test time.
So as you take the TOEFL, try to save as much space as you possibly can on your scratch paper — but in such a way that you’re still able to read what you’ve written and can easily make sense of where each note begins and ends. I suggest beginning your TOEFL notes in the top-left corner of each page and working your way down as you fill up space. Taking notes in this manner ensures that you won’t have tons of extra blank space in the margins and that you aren’t overlooking any valuable space you can use.
On a related note, remember to use both sides of your paper, too!
#2: Write Neatly and Clearly
In addition to saving space, keep your TOEFL notes organized and neat. This way, once you’ve stopped taking notes and are answering questions, you’ll have no problem deciphering your handwriting and following your train of thought.
I find that the best way to organize notes is to write down question numbers. Doing this lets you immediately know which notes correspond to which questions on the exam and reduces your risk of confusing your notes for other questions and prompts.
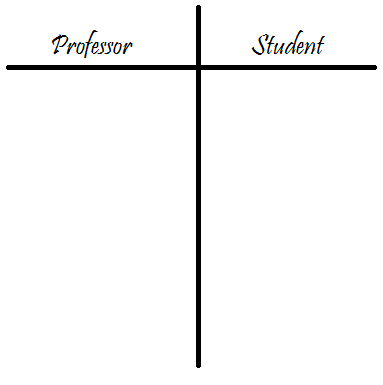
Within your notes, I highly suggest employing lists and charts. For lists, use either bullet points or numbers to keep track of steps in a process, points for or against something, solutions, examples, etc. If there are multiple speakers or sources of information, try drawing a chart with two columns. These columns can be used to summarize what different speakers say (in audio clips) or what different resources (such as a reading passage and a lecture) talk about.
Here’s an example of a chart you could make for a listening clip centering on a conversation between a student and a professor:

#3: Write Down Only the Most Important Ideas
Another tip is to only write down the most important details you’ll need to know. This is an important skill to hone because you’ll never have enough time to write down every little detail. In reality, if you were to try to take note of everything you hear and read on the test, you’d quickly fall behind and end up missing important details.
So what constitutes “important ideas”? These ideas are usually the overarching topic of a passage or audio clip, the main points or reasons, and any key examples or details used to illustrate these points. What important ideas do not encompass are irrelevant and insignificant information, such as greetings and filler words (e.g., “uh,” “um,” “well,” etc.).
For all questions containing audio clips, take care to write down the following pieces of information in your notes:
- The topic of the conversation or lecture
- Key points, reasons, and examples
- Important terminology and phrases
- Different speakers’ opinions, questions, and reactions
- Any solutions or suggestions
- Any decisions made
As for the six Speaking and two Writing tasks, make note of the main points and examples you intend to use in your responses.
#4: Avoid Full Sentences — Use Symbols and Abbreviations
You should also aim to take notes concisely and quickly. In short, always avoid writing full sentences — doing this will only slow you down in the end and result in your having a lot of extra information you don’t actually need for answering the questions. So instead of writing down every detail and word, employ an easy-to-understand system of symbols and abbreviations.
Here are some examples of symbols and abbreviations you could use in your TOEFL notes:
| Symbol / Abbreviation | Meaning |
| &, + | and |
| > | greater than, better than |
| < | smaller than, worse than |
| @ | at |
| = | is/are, agrees with ~, is the same as ~ |
| ” | ditto (is the same as ~), agrees with ~ |
| ≠ | is/are not, disagrees with ~, is different from ~ |
| O | good, correct, yes |
| ✓ | good, correct, yes |
| X | bad, wrong, no |
| Ø | bad, wrong, no |
| ? | question, maybe, unsure, confused |
| → | become ~, to, toward |
| ← | revert (back to) ~, away from, before |
| ↑ | increase, rise, high(er), better |
| ↓ | decrease, fall, low(er), worse |
| MI, MP | main idea, main point |
| b/c | because |
| w/ | with |
| w/o | without |
| ex. | example |
| aka, AKA | also known as, in other words |
| Sp. 1, Sp. A | Speaker 1, Speaker A |
| Sp. 2, Sp. B | Speaker 2, Speaker B |
| M | male (speaker) |
| F | female (speaker) |
| S, stu. | student |
| P, prof. | professor |
Don’t be afraid to come up with your own symbols, either. Just make sure the symbols and abbreviations you use are easy to write, short, and clear in meaning to you. (In other words, their meanings don’t need to be obvious to other people — just you!)

#5: Write (Mostly) in English
Though you may be tempted to jot down notes in your native tongue, it’ll generally be more convenient to take all of your notes in English because then you won’t need to waste any time re-translating your notes back into English as you answer questions.
That being said, there may be cases in which it’s faster and easier to make a quick note in your own language. While I advise against taking all of your TOEFL notes in a language other than English, if your native language uses a word that’s significantly shorter than its English equivalent, or if you’re struggling to recall a particular English word, it’s OK to make a brief note in your own language. Just be sure you’re primarily taking notes in English for the sake of clarity and consistency.
#6: Practice Your TOEFL Note-Taking Skills
The only way to become a better, faster, and more accurate note taker on the TOEFL is to practice, practice, practice! Therefore, I strongly advise honing your note-taking skills with official TOEFL questions and practice tests.
With practice tests, take care to time yourself accordingly (that is, using the time constraints you’ll have on the actual exam). In addition, try to recreate the testing environment as closely as possible so that you’ll grow more and more accustomed to taking notes under pressure and within certain time limitations.
And this concludes our six general TOEFL note-taking tips! Next up, we take a look at our 11 note-taking tips for each section of the TOEFL, starting with the Listening section.

Want to improve your TOEFL score? We have the world's leading TOEFL course.
Built by world-class instructors from Harvard and MIT, the course offers individual review, interactive lessons, and realistic online praactice, at an affordable price! It's the fastest way to get your target TOEFL score.How to Take Notes in TOEFL Listening Section
The Listening section is perhaps the most important TOEFL section on which you’ll want to take notes. This is because you must listen to lengthy audio clips and keep track of several things at once, such as the topic, who says what, and any decisions or agreements made between the speakers.
Below, we give you six expert tips on how to take notes in TOEFL Listening section.
#1: Write as You Listen
Our first and most important note-taking tip for Listening is to always write as you listen to the audio clips. While you may be tempted to listen to the audio clip in its entirety and then write down what you remember, this tactic ultimately prevents you from being able to catch all of the critical details you’ll need to know to be able to correctly answer the questions that follow.
Furthermore, taking notes after the audio clip finishes means that you’ll end up taking your notes during the time you’re given to answer questions, causing you to feel rushed and take hasty, confusing notes.
Instead, aim to jot down notes throughout the entire audio clip. Though difficult, taking notes as you listen helps you recall all of the main points you’ll likely be asked about later. And remember, you don’t need to write down every detail mentioned in the audio clip — just the main topic, the key points, and any examples.
#2: Pinpoint the Main Idea Right Away
As soon as the audio clip begins playing, try to recognize what the overarching topic of the conversation or lecture is. Doing this will help you predict what the rest of the audio clip is likely to focus on and what types of details you may hear. With most audio clips, you should be able to catch the main idea of the conversation or lecture within the first few sentences.
Lectures
In lectures, the narrator will usually give you a brief overview of what the professor will discuss. Once the lecture begins, the professor should announce more clearly what he or she will be discussing and why.
For example, in one sample lecture transcript, the narrator states, “Listen to part of a lecture in a literature class.” Right away, we know that the topic is literature — probably a certain work or writer.
The professor then begins his lecture:
“Today I’d like to introduce you to a novel that some critics consider the finest detective novel ever written. It was also the first. We’re talking about The Moonstone by Wilkie Collins.”
As you can see, within just a few sentences, we’re told that the topic of the lecture is the first detective novel ever written, The Moonstone. We can therefore predict that the bulk of this lecture will likely revolve around who wrote the novel, what its plot is, and why it’s a significant piece of work. In this case, you’d write down in your notes something to denote this main idea, such as “MI: first detective novel, Moonstone” (remember, in our symbols chart above, “MI” stands for “main idea”).
Conversations
Conversations, too, will generally introduce the main topic at the beginning of the dialogue. But because conversations are often less direct than lectures, topics may be slightly more difficult to pinpoint due to the presence of multiple speakers and the usage of informal and idiomatic language.
For example, look at this opener to a sample TOEFL conversation:
“Hi. I’m new here … I, uh, couldn’t come to the student orientation — and I’m wondering if you can give me a few quick pointers about the library? I’d really appreciate it.”
Here, the main idea is that the student wants tips on how to use the library. This idea may not be clear right away, though, due to the presence of other (less important) details, such as the fact that the student is new to the school and missed orientation. Now that we understand the main idea, we can assume that the librarian will likely offer the student numerous tips on how to use the library’s services. So in your notes, you could prepare for the librarian’s response by using bullet points for each tip the librarian may offer.

#3: Figure Out the Style of Organization
If you’re listening to a lecture, it’s helpful to know what kind of organizational style you’re dealing with so that you can prepare your notes accordingly. According to ETS, there are four main organizational styles of lectures:
- Theory and evidence: The professor introduces a theory and provides various pieces of evidence to support it.
- Cause and effect: This type of lecture focuses on the cause of something (such as an event, discovery, or scientific phenomenon) and its different effects.
- Steps of a process: In this style, the professor introduces a process and the chronological steps involved in it (usually using transitions such as “first,” “second,” “third,” etc.).
- Comparison of two things: A lecture that focuses on two different concepts’ similarities and differences.
Each of these styles can be understood fairly early on in an audio clip by listening for key words, phrases, and descriptions given by the professor.
For example, in one sample lecture transcript, a history professor remarks the following:
“So we’ve been talking about the printing press, how it changed people’s lives, making books more accessible to everyone. More books meant more reading, right? But as you know, not everyone has perfect vision. This increase in literacy, in reading, led to* an increase in demand for eyeglasses. And here’s something you probably haven’t thought of: this increased demand impacted societal attitudes towards eyeglasses.”
*Emphasis mine.
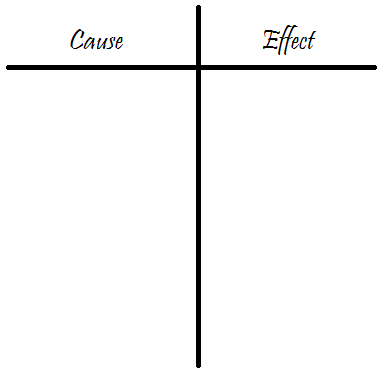
Notice that the professor uses the phrase “led to” to describe how the increase in literacy has affected the demand for eyeglasses. Therefore, this lecture will most likely be a cause and effect lecture discussing how the rise in literacy contributed to an increased demand for eyeglasses.
Here’s an example of how you could organize your notes for such a lecture:
In another sample lecture transcript, a geology professor states,
“It’s really no secret that glaciers flow because of gravity. But how they flow, the way they flow needs some explaining.”
In this case, the professor is describing how glaciers flow — i.e., a scientific phenomenon — meaning that this lecture will likely describe the steps of a process. You could therefore arrange your notes in a numbered list to indicate which steps come before others.
Want to improve your TOEFL score by 15 points?
Registration is now open for our best TOEFL course. We guarantee your money back if you don't improve your TOEFL score by 15 points or more.
PrepScholar TOEFL is online and it features thousands of practice questions and 1-on-1 Speaking and Writing review and feedback.
#4: Note Important Terms and Concepts
In lectures, you’ll often hear a professor mention a particular term or concept, which will usually be accompanied by an image of the word or phrase written out on a blackboard. In these cases, always take care to write down the term or concept in your notes. And don’t forget to note its definition, too, once the professor explains what it means.
Chances are at least one of the questions on Listening will ask you about how the professor explains a particular word or phrase and what it means in the context of the lecture. So it’s extremely important you’re able to recall exactly what these concepts and their definitions are.

#5: Keep Track Of Who Says What
In some of the audio clips, you’ll hear multiple speakers. These clips often center around conversations between two students, a student and a professor, or a student and a school employee, such as a librarian or coach. Though you usually won’t be told the names of the speakers, it’s critical you keep track of who says what — in particular, who holds which opinions, who poses which questions, and who makes which points.
If an audio clip is of a conversation with only two speakers, consider organizing your notes so that you have a column for Speaker A and a column for Speaker B (see general tip #2 above for an example). You may also refer to the speakers as “F” (for “female”) and “M” (for “male”). Once you’ve made your chart, begin to bullet point each column with notes detailing the main points each speaker brings up during their conversation.
For lectures in which one professor speaks and multiple students ask questions or comment on the subject being discussed, you could make another chart with one column for the professor (P) and another for the students (S).
#6: Listen for Transitional Words and Phrases
Finally, make sure to keep track of any transitional words or phrases the speakers use to help organize their thoughts and introduce new ideas. While you don’t need to record these transitions in your notes, listening for them will allow you to identify when a new point or example is being introduced.
There are many transitions and conjunctions to listen for in TOEFL audio clips. Some of these include:
- First
- Second
- Next
- Also
- Finally
- Lastly
- So
- Now
- And
- But
- However
- For example
- For instance
- By the way
- Anyway
When you hear ordered transitions, such as “first,” “second,” and “next,” note a separate thought by bullet pointing or numbering a new line. With contrastive transitions (e.g., “but,” “however,” etc.), make a note that the upcoming point will contrast with what was just said, perhaps by marking the new thought with an “X” or other symbol.

How to Take Notes in TOEFL Speaking Section
The Speaking section is arguably one of the most difficult sections on which to take notes because you have such little time to actually prepare your notes. What’s more, on two of the six tasks, you must read a passage and listen to an audio clip before you can even say your response! Fortunately, this means that many of the Listening note-taking tips we’ve given you above should work well for the Speaking section, too.
But are there any other tips you can use for taking good notes on Speaking? Absolutely! Here, we give you our top two tips for note taking on the TOEFL Speaking section.
#7: Jot Down the 2-3 Points You’re Going to Make
On each Independent Speaking question (tasks 1 and 2), the prompt will ask for your opinion on a topic by requiring you to speak about a personal experience or preference. For these questions, you’ll only have 15 seconds to take notes and prepare your answers. With such a short time frame, you’ll need to get right to the heart of your response. So in your notes, focus on getting down your two or three main points (a bullet list works well) and a couple of examples you can use to illustrate these points. And that’s it!
Don’t waste any time coming up with introductions or conclusions — your main responsibility here is to give clear and distinct reasons for your opinions. Moreover, you’ll want to sound as natural as possible when you speak, so avoid writing out full sentences.
#8: Take Notes as You Read and Listen
For tasks 3 and 4 (the first two Integrated Speaking tasks), in addition to using your speaking skills, you must read a short passage and listen to a lecture or conversation on the same topic. Because you may not read the passages more than once on this section, I strongly recommend taking notes during both the reading and listening segments.
One solid note-taking method we’ve briefly covered is to draw a chart. In this case, one column will be for your notes on the reading (R) passage, and the other will be for your notes on the listening (L) clip. Unfortunately, you’ll only have 45-50 seconds to read the passage, so as you read, quickly note the main idea and any major points it makes or examples it uses.
With question 3, you must listen to a conversation between two speakers about a campus issue. By dividing your listening column into two sub-columns, you can specifically note what the female (F) speaker and male (M) speaker are saying to each other:

With question 4, you’ll listen to a lecture instead of a conversation; therefore, you must take note of how the professor defines and explains a particular academic concept or term. You’ll then have 30 seconds to prepare your response, during which time you should look at the chart in your notes and work on briefly outlining the two or three main points (you can just circle these) you’re going to discuss.
As for the final two Speaking tasks, both involve audio clips (without reading passages), so it’s best to refer to the Listening tips above for guidance.

How to Take Notes in TOEFL Writing Section
Finally, we get to the TOEFL Writing section. On this two-task section, you’ll write an Integrated essay and an Independent essay, both of which will require careful planning. Our three tips below teach you how to effectively use your scratch paper on the Writing section so that you can plan out your essays and ultimately secure a high Writing score.
#9: Outline Your Essays
The most important way to use your notes on Writing is to outline your essays. Outlining means coming up with a brief overview of the main points you’re going to write about. Ideally, you’ll make a bullet list of two or three main points and then note any relevant examples you can use to illustrate these points.
As is the case with the Speaking section, don’t write down exact sentences or outline your introductions and conclusions (you may not even need a conclusion anyway!). Rather, just make sure you have a general idea as to how you intend to organize your essay and the points you’re employing.
#10: Allocate Your Time Wisely
While outlining your essays, make sure you’re allocating your time wisely so that you’re not accidentally wasting time you could instead be using to write your response.
For the Integrated essay, you’ll have 20 minutes to plan and write your essay, which should be around 150-225 words. Because of the short time frame, I recommend spending no more than two to three minutes outlining your essay. This is because you’ll need the bulk of your time to actually write out your response, especially if you’re hoping to hit that 150-word minimum.
For the Independent essay, you’ll have 30 minutes to outline and compose your essay; however, this response should be longer — at least 300 words. Because you’ll have a little extra time but will also need to write more, I suggest spending at most five minutes outlining your essay.
#11: Take Notes for Listening, Not Reading
On the Integrated task, you must read a passage and then listen to an audio clip of a lecture on the same topic; this lecture will either support or challenge what’s written in the passage. You’ll only get to listen to the audio clip once, so it’s imperative you take notes on the main points of the lecture as you listen to it (refer to the Listening tips section above for more information on how to do this).
That said, you do not need to take notes on the reading passage. Unlike the audio clip, which you only get to hear once, you’ll be able to reread the passage as many times as you want while writing out your response. So as you read the passage the first time around (you’ll get three minutes to read it), it’s OK to forgo note taking and instead concentrate on simply comprehending the topic and main ideas.
Then, once you’ve got your listening notes, start outlining your essay by comparing your notes on the lecture with what’s written in the passage. As you outline, you may want to indicate with symbols, such as Os and Xs, which areas of the lecture support or disagree with the passage.

Recap: How to Take Great TOEFL Notes
Although you can take notes throughout the TOEFL, note taking will be less important for the Reading section and more important for the Listening, Speaking, and Writing sections. Taking notes on the TOEFL allows you to organize your thoughts, pinpoint key points and examples, and recall specific details you’ll need to know in order to successfully complete different tasks.
Our six general TOEFL note-taking tips are to:
- Use as much space on your scratch paper as possible
- Write clearly and keep your notes organized
- Write down only the most important ideas and points
- Avoid full sentences and instead stick with symbols and abbreviations
- Take notes primarily in English
- Practice, practice, practice!
We’ve also given you 11 expert tips on how to take TOEFL notes on the Listening, Speaking, and Writing sections. Some of the most important tips include taking notes as you listen, noting the major points you’re going to talk about, and spending a few minutes outlining your essays.
Armed with these TOEFL note-taking tips, you should be able to take the TOEFL with complete and utter confidence!
What’s Next?
Need help preparing for the TOEFL? Our eight expert tips teach you how to raise your English level and ultimately become a master at the TOEFL.
Looking for quality TOEFL resources to help you study? Check out our guide to the best TOEFL prep books and our compilation of TOEFL practice tests and resources.
Want to ensure you’ll get a high Speaking score? A high Writing score? Our original templates for Speaking and Writing are certain to guide you to success on test day!
Ready to improve your TOEFL score by 15 points?
Download our best TOEFL Strategy eBook (valued at $14.49) for FREE! Learn the top 5 strategies you must know to improve your TOEFL score. Download it for free now: